
It was about time to replace my old, stained, and burned ironing board cover to a new one. And you know what I mean if you see the below image...
最近、我が家のアイロン台カバーを張り替えました。これまで使っていたカバーはというと。。。

Ewwww yuck!
ギャー!アイロンで焦がしたりシミがついたり、こんなに見るも無残なことになっていたのです~。
.jpg)
So I rummaged through my drawers to find my secret weapon: a staple gun!
というわけで私の秘密兵器、ステープルガン登場です。

So here's how I put together my DIY ironing board. I cover a thick cork board with layers of fabrics and batting in this order: upcycled fleece, insulated batting, and the exterior fabric. The cork board is cut to fit the "baby changing" surface of our chest. (We used the chest top when our girls were babies).
私のアイロン台はもともと市販のものではなく、なんちゃって DIY で自己流に作ったものです。作り方はいたって簡単。厚手のコルクボードに→使い古したフリース→保温保冷シート→表布(カバー用)コットン生地、の順に重ねているだけの簡単仕立てです。 ちなみにコルクボードは我が家の娘たちの赤ちゃん時代に活躍した、チェストの「おむつ交換台」部分にぴったりフィットするサイズです。
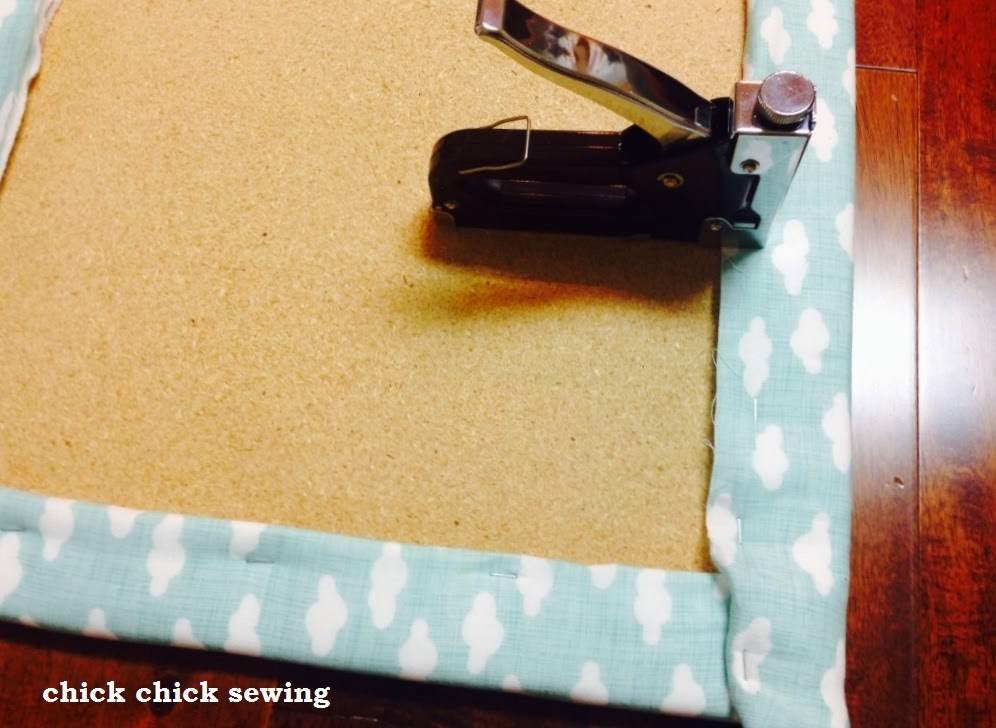
Carefully stretch all three layers taut. Use staple gun to hold all layers to the back side of the board like this.
3枚重ねの生地をしっかりと張り、ステープルガンを使って裏側に固定します。


Ta-da! I'm so happy with the outcome!
出来上がりです♪

Here's how my updated ironing area looks like in the corner of our kitchen/family room a.k.a. my crafting area!
我が家のキッチン&居間の隅っこに設置したアイロン台スペース。簡単リメイクできて満足です^^
***Love, Amy***
Find me on Facebook (Amy Morinaka) →☆
Follow me on Instagram @chickchicksewing →★
No comments:
Post a Comment